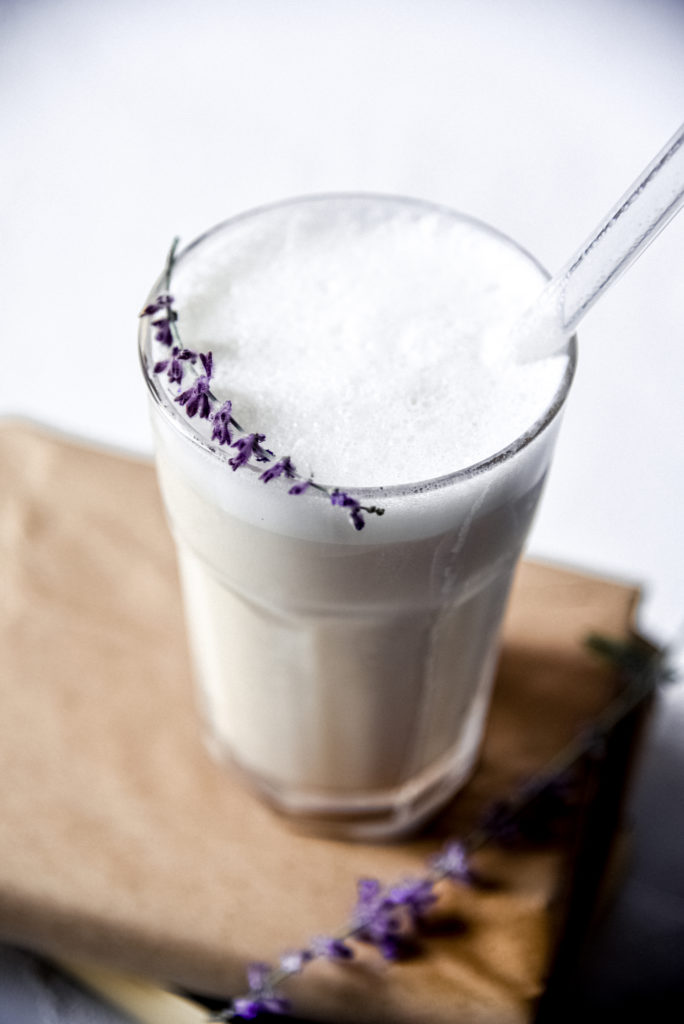
This Iced Earl Grey Latte with Easy Vanilla Cold Foam is creamy and refreshing with a sweet hint of vanilla. Also answered in this article are your top questions for making café-quality cold foam at home.
If you’re like me and most of your “quick errand trips” include a necessary stop at the coffee shop – this one’s for you! Those pricey drinks tend to add up quickly, so I love trying to replicate some of my café favourites at home for a fraction of the price.
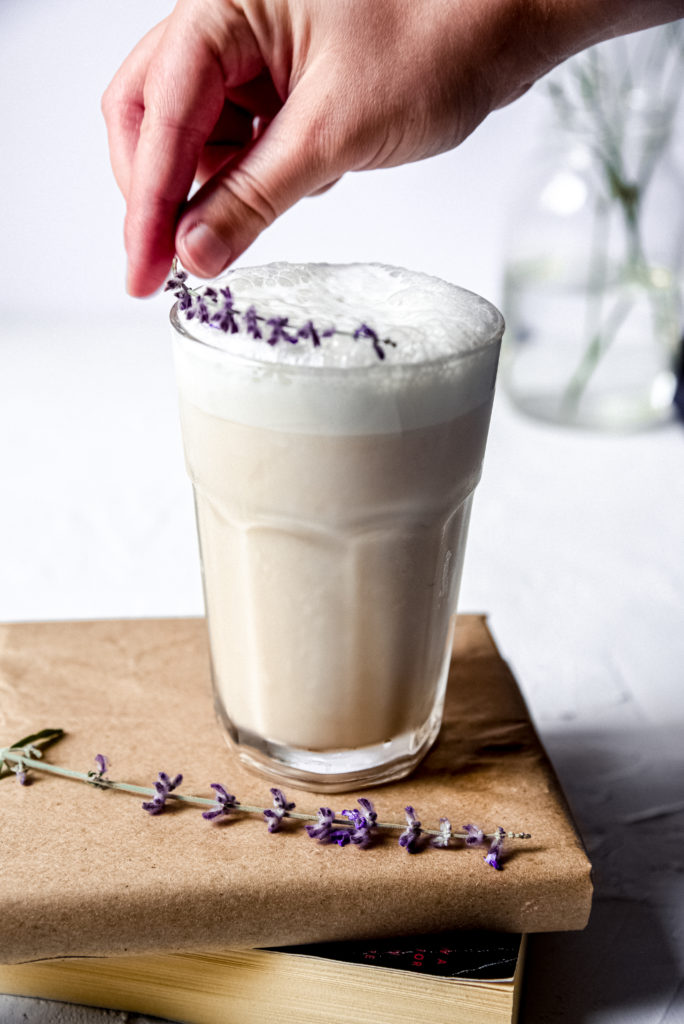
This Iced Earl Grey Latte with Easy Vanilla Cold Foam is creamy and refreshing with a sweet hint of vanilla. Cold foam, one of the latest trends at Starbucks, is milk that is frothed without using heat to create a silky and luxurious topper for iced beverages. While it may sound fancy, cold foam is surprisingly easy to make yourself! In this post you will learn everything you need to know about creating cold foam from home, without any fancy equipment or ingredients!
How to make an Iced Earl Grey Latte with Easy Vanilla Cold Foam:
- Brew your tea. We’re using only a small amount of water and a long steep time (15 minutes!). This “tea concentrate” will give our iced lattes all of their Earl Grey flavour, so it needs to be strong!
- Make the vanilla simple syrup. While the tea is brewing, combine your sugar and water in a small saucepan over medium heat. When it comes to a simmer and the sugar is dissolved, take it off the heat, stir in your vanilla and let it cool. It really is that simple! Bonus: the simple syrup makes more than you’ll need for this recipe, so you’ll have extra for all your other favourite coffee (or cocktail!) beverages. Store leftovers in a jar in the fridge.
- Whip up some cold foam. There are a few easy methods for making cold foam at home. See the section “How do I make cold foam at home?“ below to decide which will work best for you.
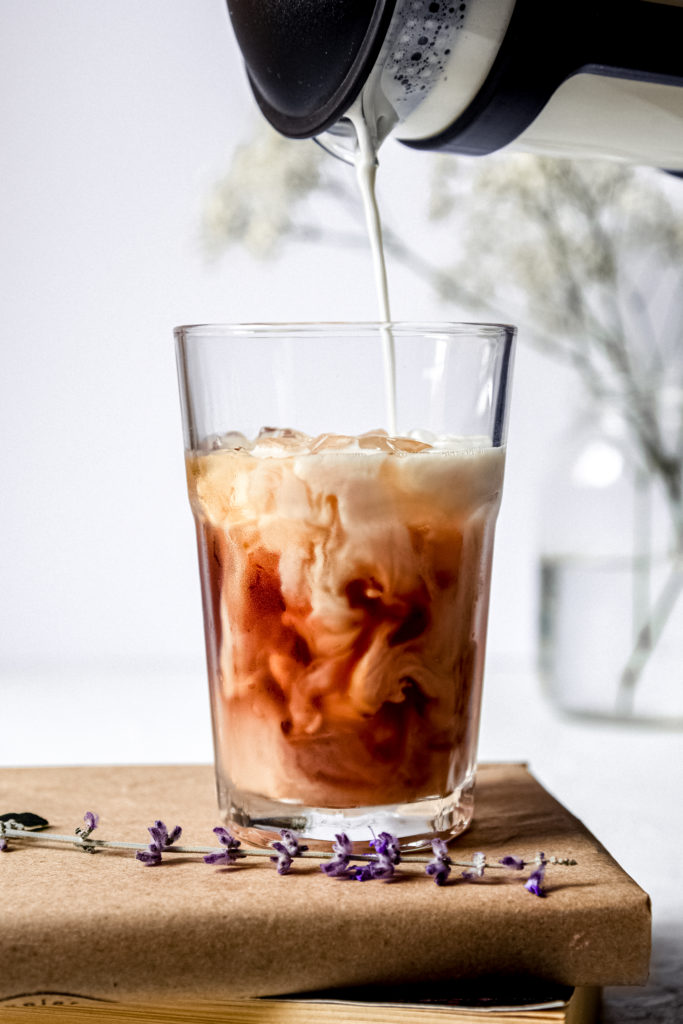
- Pour over ice & enjoy! Fill your glass with ice and pour in your cooled tea concentrate. Top it off with your vanilla cold foam and get sippin’!
Homemade Cold Foam FAQ
Let’s tackle a few frequently asked questions about making cold foam at home:
Which type of milk foams the best?
How well milk will foam depends on its protein and fat content. When milk is frothed, air is essentially forced into the milk and entrapped by protein molecules, which creates air bubbles, or a foam. However, too much fat can make it hard for the milk proteins to hold air. Because the different types of dairy milk (skim, 1%, 2%, 3.25%, etc.) contain varying amounts of protein and fat, some create foam better than others.
Milks that are lower in fat and higher in protein (e.g. skim milk) are the easiest to froth and they create a large volume of light foam with large air bubbles. Higher fat milk (3.25%) can be a bit trickier to work with but creates smaller air bubbles that give the foam a thicker, creamier texture.
If you’re looking for a dairy-alternative, soy milk may be your best bet for foaming as it has a protein content most similar to dairy. There are also “barista quality” dairy-free milks available (like this one!) that are specifically formulated for easy foaming.
To learn more about the nutritional differences between the milk and milk-alternatives check out my other article Dairy vs Non-Dairy Milk: How Do They Compare?
What temperature should the milk be?
Heating the proteins in milk help them to create the structure around air bubbles and form a stable foam. However, since we are making an iced drink we won’t want to use super hot milk. In this recipe, finding a happy medium temperature seems to work well. By only slightly warming the milk before foaming, we help the milk proteins form stable air bubbles while also keeping the milk cool enough to avoid melting all of our ice. To keep things as cool as possible, chill the tea concentrate before putting your drink together, too.
How do I foam the milk?
There are a number of methods for easily foaming milk from the comforts of your own kitchen:
- Use a french press. This is my personal favourite method to make cold foam at home. The french press creates tiny air bubbles that make a smooth and luxurious foam. Be sure to fill the french press with enough milk for the plunger to reach. On the other hand, avoid overfilling as the volume of foam will be double to triple the initial amount of milk.
- Use a handheld foaming wand. These do fairly well for frothing milk and are relatively inexpensive.
- Use a blender. Blend your milk on high for 15-20 seconds, until you reach your desired foaminess.
- Shake milk (vigorously) in a sealed jar. This is the simplest method that doesn’t require any special equipment. However, from experience it creates larger air bubbles that don’t last as long as the french press method. In a pinch, a jar will do but it wouldn’t be the first method I’d recommend.
Other Iced Drinks with Cold Foam
If you aren’t a fan of Earl Grey tea or want to try replicating another of your café favourites, here are a few other cold foam beverage variations to try:
- Iced Chai Latte with Cold Foam. Swap the Earl Grey tea bag for Chai and top it off with vanilla cold foam and a dusting of cinnamon.
- Iced Green Tea Latte with Cold Foam. Use a green tea bag and finish with vanilla cold foam.
- Iced Coffee or Espresso with Cold Foam. Replace the tea with strong brewed coffee or espresso over ice. Get creative with the cold foam – replace the vanilla with another flavoured syrup, like hazelnut or caramel.
Looking for more?
Check back here for my latest recipes! And don’t forget to follow along on Instagram so you don’t miss a thing!
Print
Iced Earl Grey Latte with Easy Vanilla Cold Foam
- Total Time: 25 minutes
- Yield: 1 1x
Ingredients
Iced Earl Grey Tea
- 1 Earl Grey tea bag
- 1/2 cup boiling water
- ice cubes
Easy Vanilla Cold Foam
- 3/4 cup milk (of choice)
- 1–2 tbsp Vanilla Simple Syrup (recipe below)
Vanilla Simple Syrup
- 1/2 cup granulated sugar
- 1/2 cup water
- 1 tbsp vanilla extract
Instructions
- Prepare your tea. In a tall glass, steep an Earl Grey tea bag in 1/2 cup of boiling water for 15 minutes. This "tea concentrate" will flavour the whole beverage, so it needs to be strong! Once steeped, place the tea in the fridge or freezer to cool while you prepare the other components.
- Make the vanilla simple syrup. In a small saucepan, combine the sugar and water. Bring to a simmer over medium-high heat, stirring to dissolve the sugar. When fully dissolved, take the syrup off the heat and stir in the vanilla extract. Let cool (Note 1).
- Whip up some vanilla cold foam. Combine the milk and 1 to 2 tablespoons of Vanilla Simple Syrup in a microwave-safe glass. Heat for 20-30 seconds, until the milk is just warm (Note 2). Pour the milk into a french press and pump the handle until the milk is thick and foamy, about 15-20 seconds (See Note 3 for alternative foaming methods).
- Put it together. Remove the glass of tea from the fridge or freezer and fill with ice cubes. Top with the vanilla cold foam and enjoy!
Notes
- This recipe makes approximately 3/4 cup of syrup. Store the rest in a jar in the fridge for use in your other favourite beverages. Alternatively, you can use a store bought vanilla syrup.
- Slightly heating the milk helps to create foam more easily. However, we don’t want the milk to be hot, or else it will melt all of our ice.
- If you don’t have a french press, try using a handheld milk frother, a blender or shake the milk vigorously in a sealed jar.
- Prep Time: 25 minutes
- Category: Drinks